


During a little trip to the Kawarthas in Northern Ontario a while back, Darin and I spotted some ultra fab beer bottle glasses at an art shop. We were both struck by the clever ‘upcycling‘ concept. That said, we didn’t really want to drop $20 a pop for the glasses, so we left the quaint shop empty handed. Back home I hopped online and discovered a way to make my own beer bottle glasses with a glass cutting device called a Kinkajou. The more I read about it, the more excited I got. But then my heart sank: the device was part of a Kickstarter campaign and wasn’t available until the goal was met.
As the months went on I forgot all about the Kinkajou, until out of the blue someone from the company contacted me to let me know the product was now available, and would I like one to try out?
“Yes please!” (Want one too? We’re giving one away, so read on!)
By the time the Kinkajou arrived, Darin and I had sucked back enough craft beer in cool bottles to amass a decent stockpile. Hard work, but necessary for the project at hand.
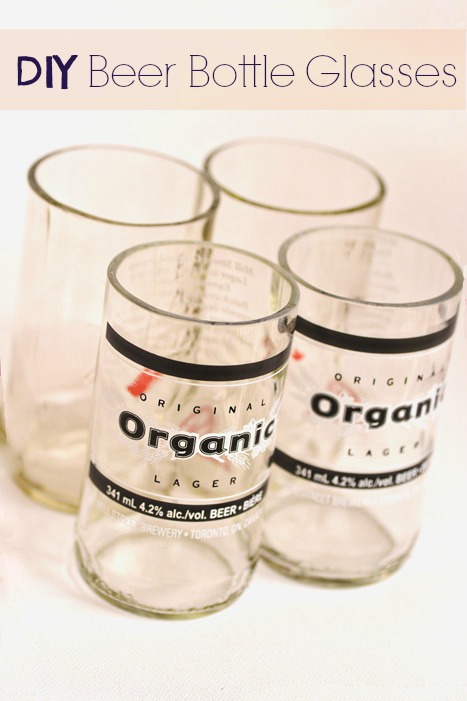
Before we go ahead with the full tutorial on how to make your own ultra fab beer bottle glasses (DIY wedding favors? Oh ya!!!), we have to say that although this product is awesome and definitely worth the $50, it’s also a bit tricky. About a third of the beer bottles we cut didn’t turn out – mainly because of alignment issues when cutting the glass. There is definitely a technique to cutting the glass – and we found that some bottles were more difficult than others. So, if you think you’re going to bang out 50 of these in one night, you’re probably going to be disappointed. Also, hand sanding the edges requires time; it took about 10- 15 minutes of sanding for each glass. If you are making these as wedding favors and you’re wedding is still months away, this shouldn’t be a problem – especially if you enlist help from your friends.
One handy tip: If you are making these as wedding favors, head over to your local bar or restaurant and see if they’ll part with their empties. There are lots of uber cool beer bottle designs to be had – and your local swanky bar will be the best source for these – unless of course, you plan on doing lots of beer swilling yourself up until your wedding date. (You can also use wine, liquor or pop bottles – and you’re not confined to making drinking glasses. You can also make candle holders, pendant lights and vases.)
Here’s how to make beer bottle glasses with a Kinkajou:
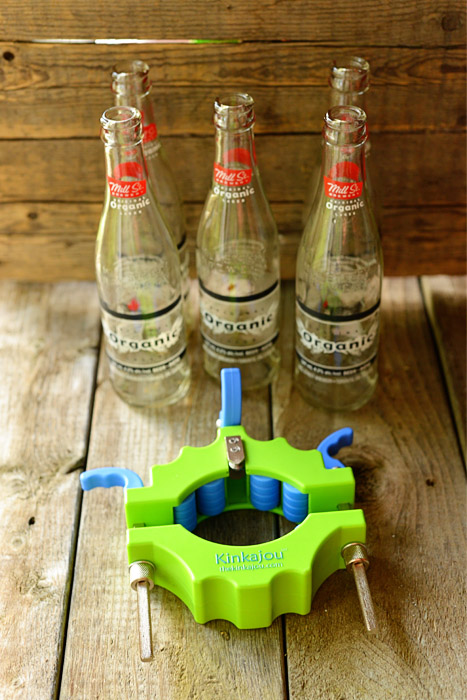
You will need:
- Kinkajou
- safety glasses
- thick rubber gloves (ours were thick leather garden gloves because we just couldn’t wait, however, when handling the bottles and doing the hot/cold thermal shock to separate the neck, the rubber gloves are definitely better as they won’t let your hands get wet with boiling water if it strays off course.)
- 180 grit sanding block
- 80 grit sandpaper (our Kinkajou came with this)
- kettle for boiling water
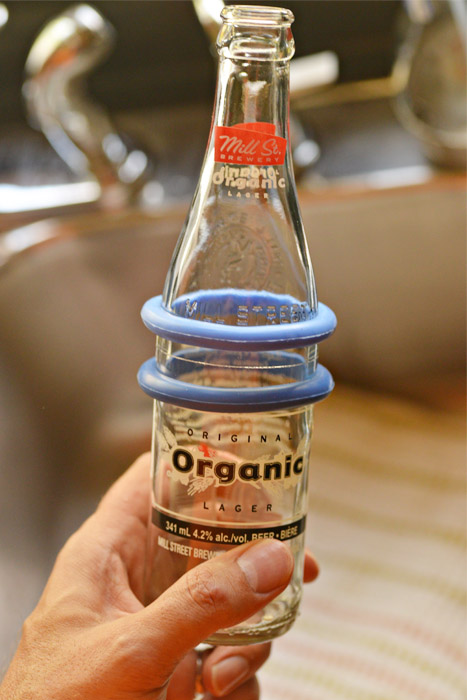
Step One: Wash bottle thoroughly, making sure there is no residue. Don safety glasses. With the blue cam lock levers in the up or unlocked position, loosen the nuts so that the Kinkajou will slide easily over the bottle.
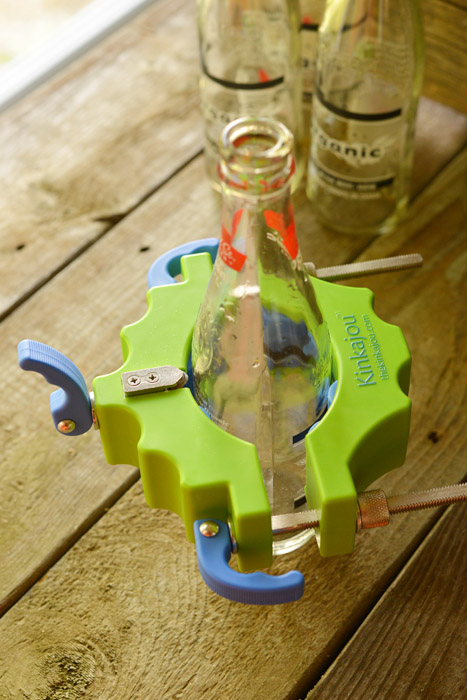
Step Two: Snug the nuts down very lightly with the cam locks in the unlocked position, leaving equal gap space on either side and line up the cutting wheel where you want to make the cut. The location really depends on the bottle graphics. Some bottles have graphics that are pretty high up the neck. Our first attempts to cut around the tapered portion of the bottles was unsuccessful. It would probably take quite a bit of practice to have success cutting on the tapered part. For this first attempt we settled for bottles with graphics that were low enough not to be cut off and the cutting wheel was not riding on the neck of the bottle.
Step Three: Lock the cams down to clamp the Kinkajou securely but making sure the Kinkajou will spin around the bottle with not too much effort. If it takes too much force you end up not aligning the blade and the cut line won’t match up when you get back to the starting point. It took about 4-5 practice bottles to get the technique right.
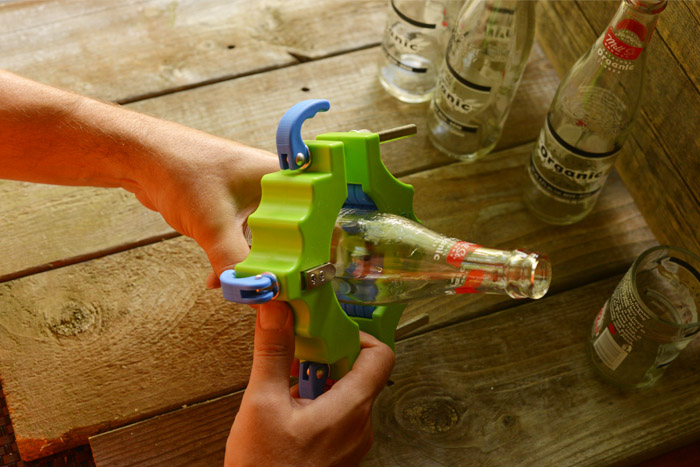
Step Four: Set the cam lock for the cutter wheel. The wheel is spring loaded and maintains contact with the glass as you rotate the Kinkajou around the bottle. The technique we used was the same suggested by the Kinkajou inventor. It seems to work pretty good this way.
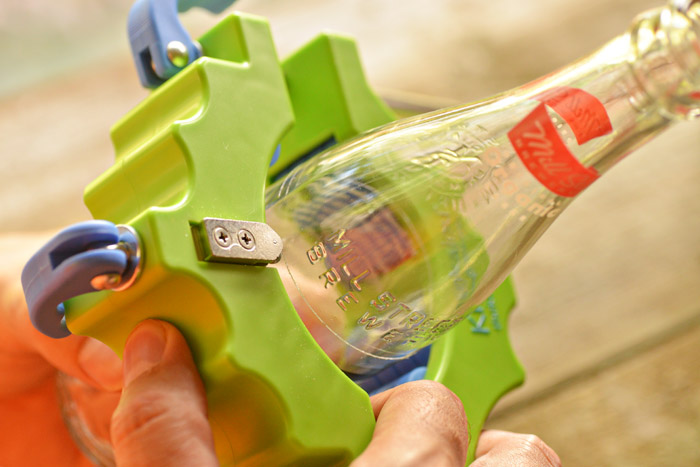
Step Five: Continue around the bottle paying close attention not to put excessive force on either the bottle or the Kinkajou, otherwise the cut line won’t be aligned to the starting point. When you do get it right you hear a clicking sound when the cutter wheel falls into the groove of the starting point.
Step Six: Install the silicone rings on either side of the cut line to guide the hot/cold thermal shock water.
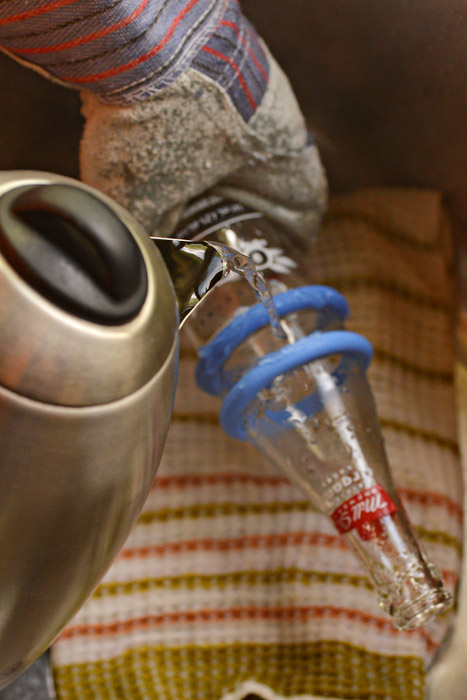
Step Seven: Put your gloves on. With a dish towel covering the bottom of the sink to catch the bottle neck, start by running cold water on the bottle for about 30 seconds. I took pictures and Darin did the water pouring. It was easier with two people, one person holding both ends of the bottle to prevent the neck from falling into the sink, and the other doing the pouring of boiling water.
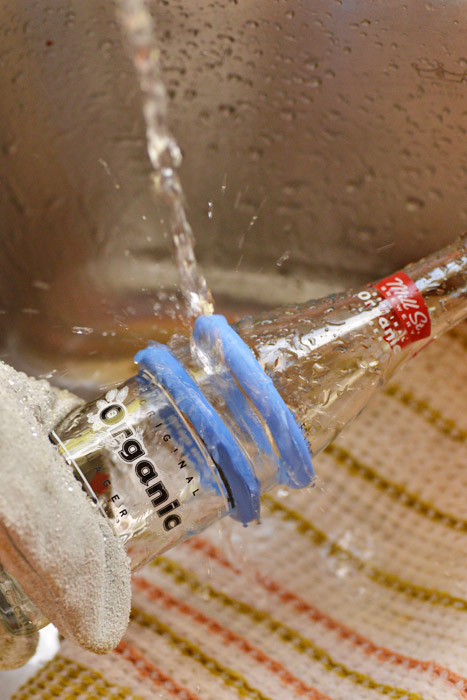
Step Eight: After the cold water bath, pour near boiling to boiling water into the gap between the silicone rings. Be very careful not to pour boiling water on your hands! The thick rubber gloves would be best for this part. The number of cycles of cold/hot depends on the type and thickness of the glass. For these bottles after four cycles you could see the crack form. After a couple more cycles the pieces just separated without much fanfare.
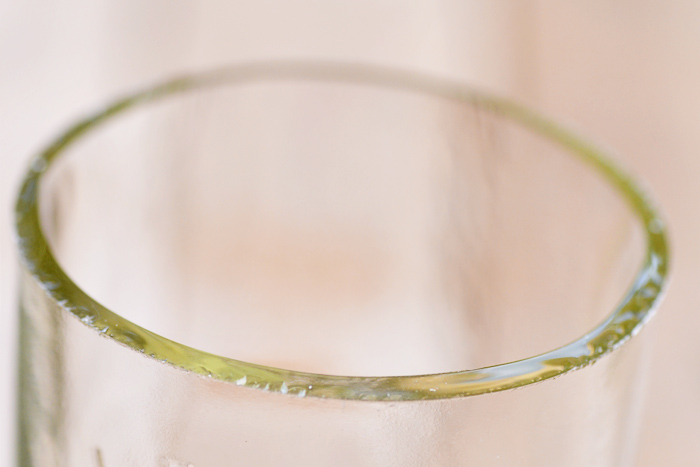
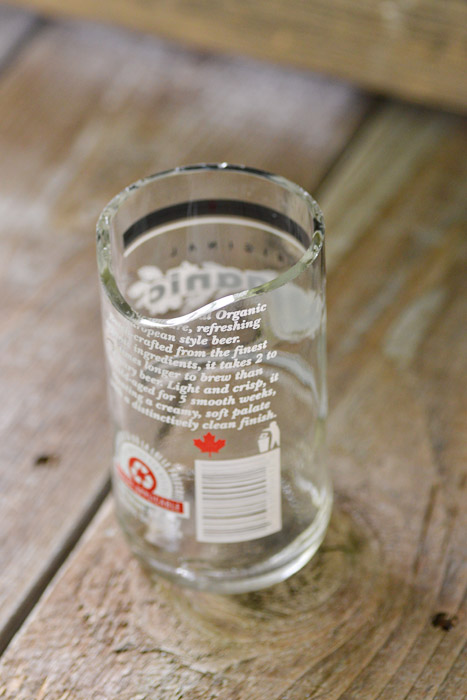
Step Nine: Be careful with the separated pieces. The edges are very sharp. A few of our bottles did not separate perfectly as seen in the second picture below.
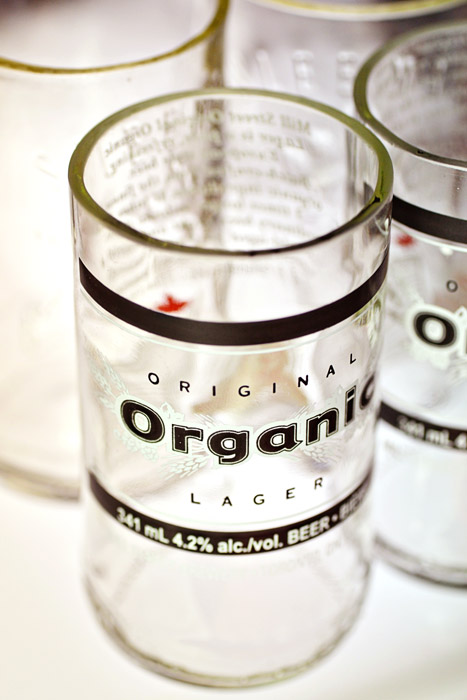
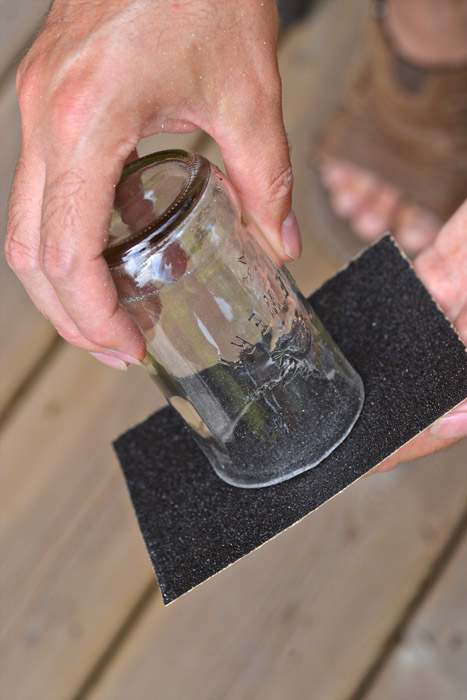
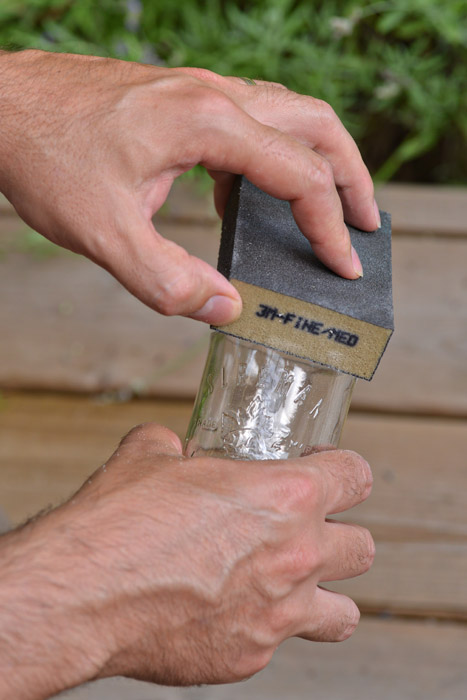
Step Ten: Sand the edges of the glass to your desired finish. The Kinkajou comes with a few pieces of coarse sanding paper. It was OK for knocking down the cut face. We had a sponge sanding block on hand with two different grits on it that worked well to round the edges off. It took 10-15 minutes of sanding to get a decent finish on the lip of the glass. It’s a good idea to dampen your sandpaper with a light sprinkling of water or or the edge of the glass so you minimize the dust. If you are doing a lot of bottles, it’s preferable to do the sanding outdoors.
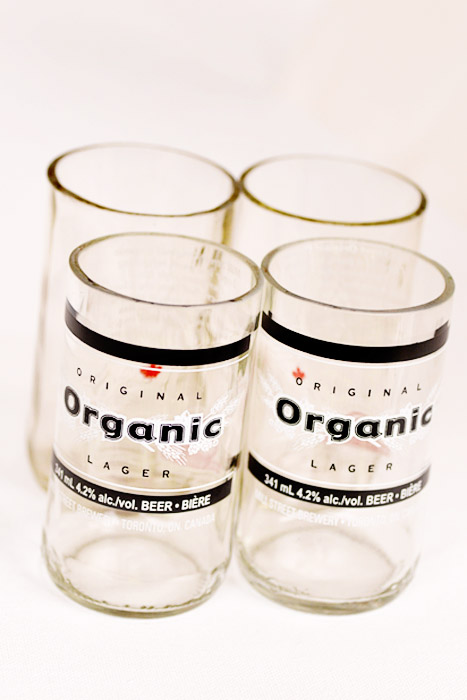
Voila! Your finished glass. Give it a good wash, then fill with your favorite beverage – or give as a wedding favor!
Want to win your very own Kinkajou? How about a Kinkajou, a Jaburu (this clever product lets you make cool glasses from beer bottle necks) and a finishing kit? All you need to do is Like us on Facebook, then leave a comment here telling us what you will do with your Kinkajou for your chance to win. One winner will be chosen. Open to U.S. and Canadian residents. Giveaway closes August 23, 2013 at 11:59 pm Eastern. Winner will be chosen at random.