


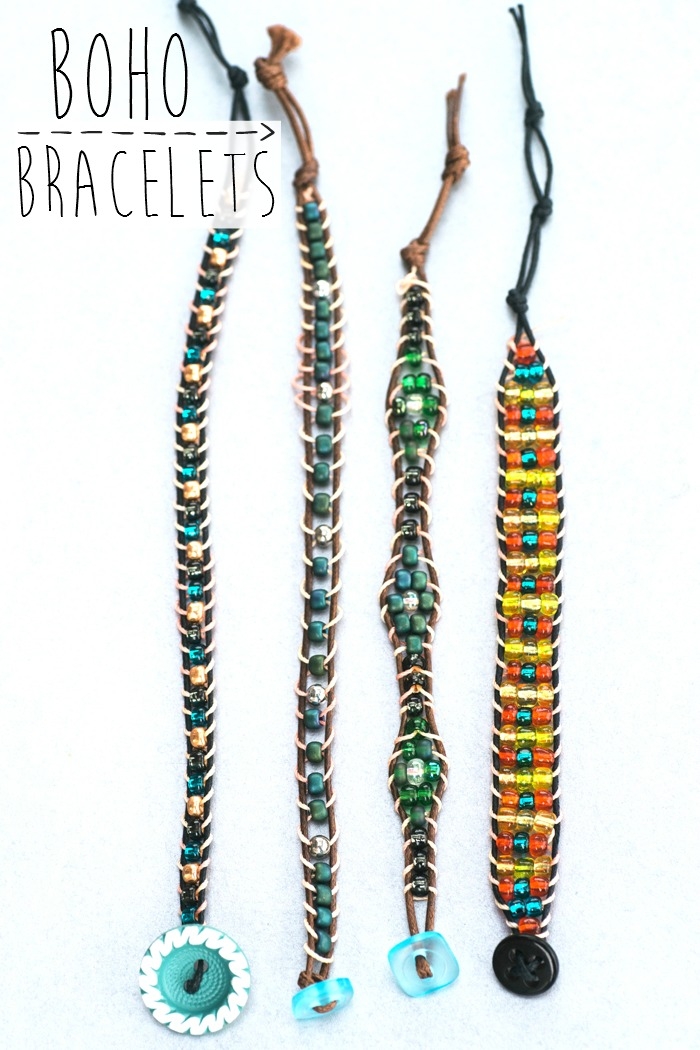
Want to make awesome DIY Beaded Boho Bracelets for your besties? These beautiful bracelets are easy to make and inexpensive. Give them out as shower favors to your girlfriends, or hand them out at your wedding. These would be perfect for a beach wedding!
To make these bracelets you will need:
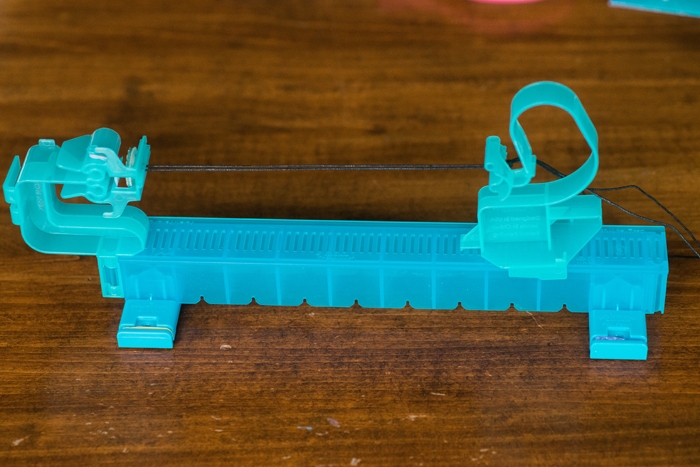
(The Wrapit Loom Pro was given to us by Rainbow Loom, the company that manufactures the bracelet maker.)
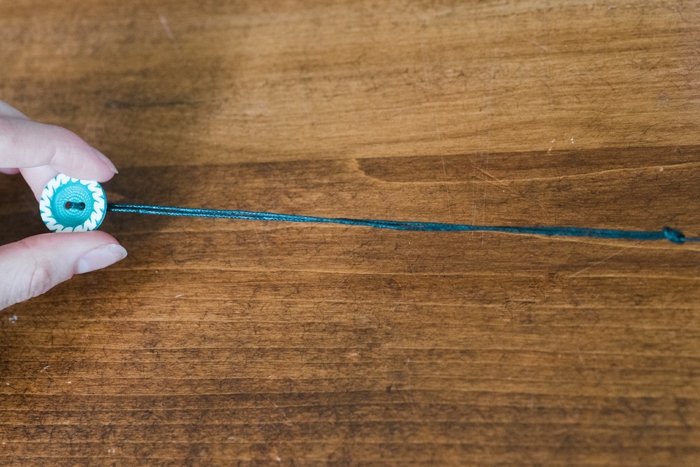
Set up your Wrapit Loom Pro. Cut a piece of cord (included with the Bracelet Maker) so that it is 30 inches long. Fold the cord in half, and insert both ends of cord through button holes. Slide button so that it is in the middle of the cord. Tie a knot to secure button.
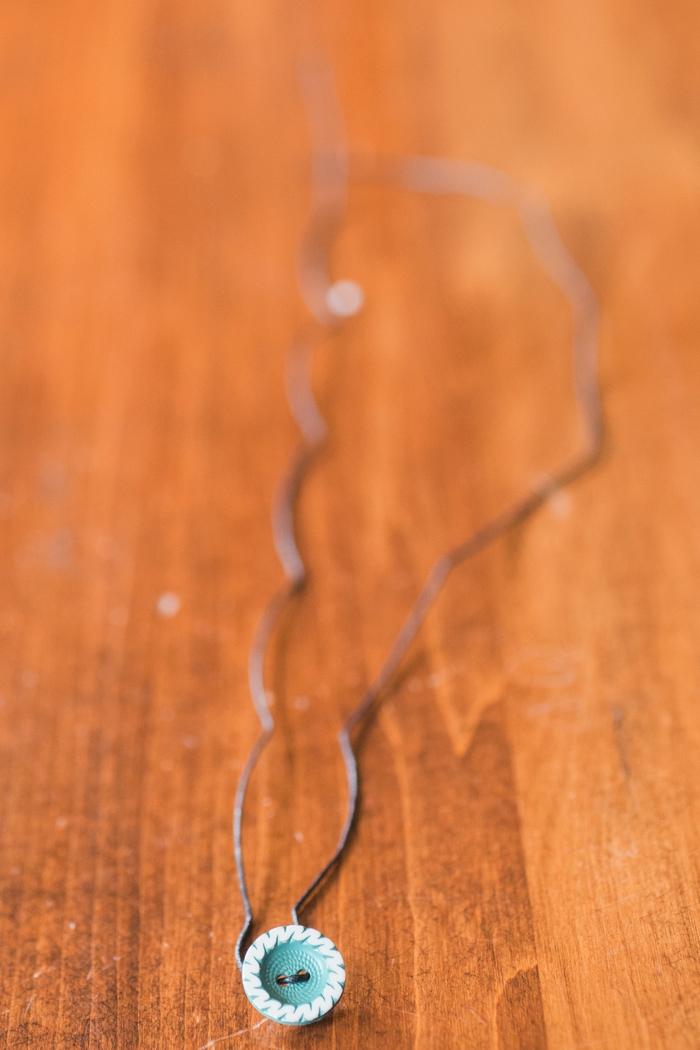
Place cord with button around wrist to measure size of bracelet. Tie a knot on the opposite end of the cord.
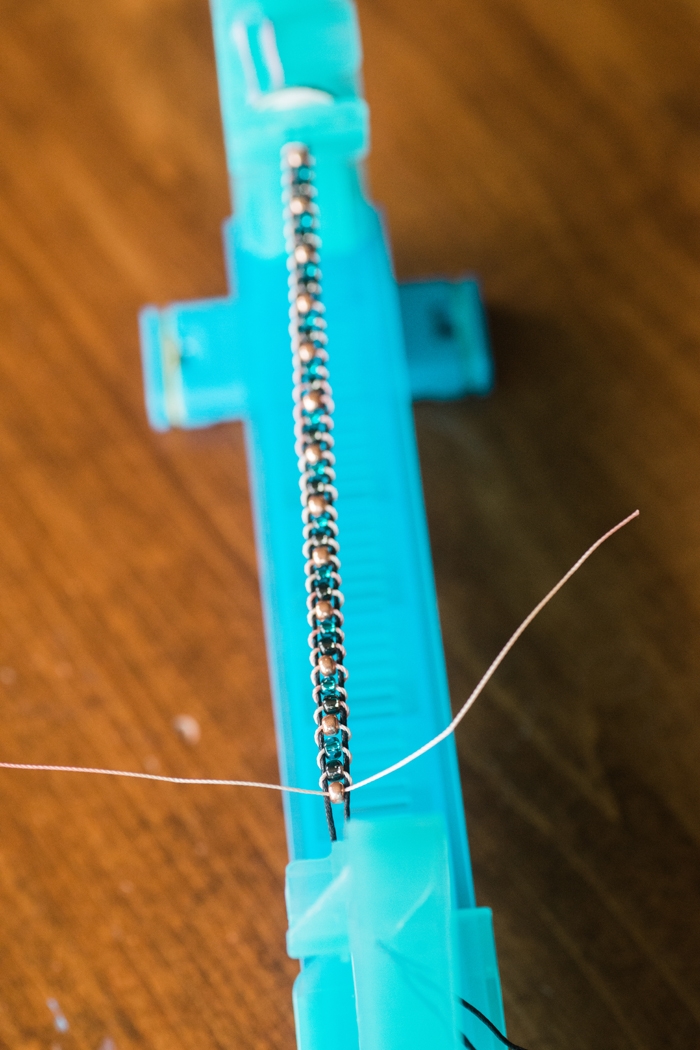
Turn the bracelet maker on its side. Place the button into the ‘clamp’ .
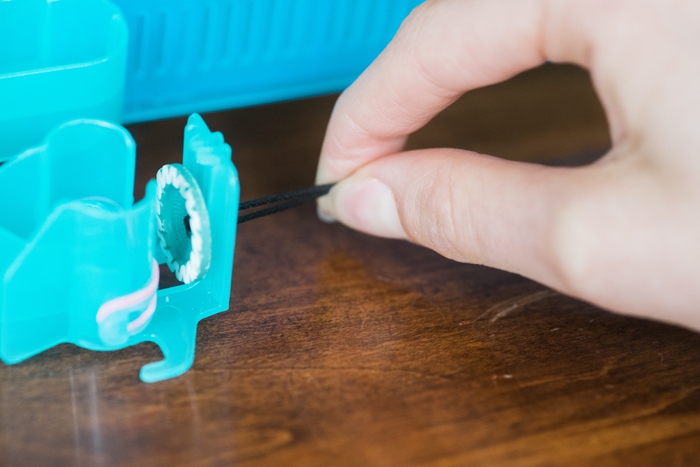
Slide the knot into the ‘clip’ on the opposite side of the bracelet maker. Slide ‘clip’ away from ‘clamp’ (3-4 clicks) to tighten the cord.
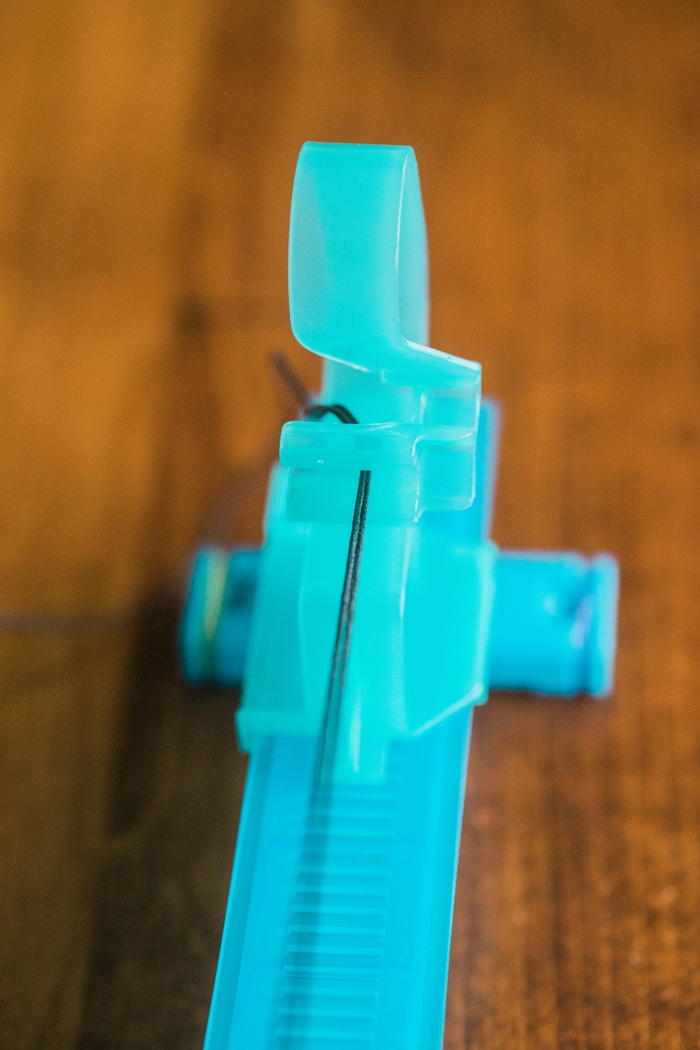
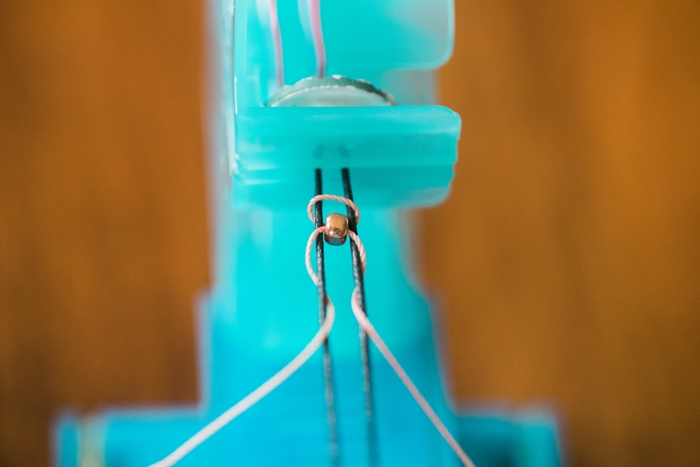
Place wrap line (included with the bracelet maker) over the cord on the button end of the cord. Wrap the right side of the thread under and over the cord on the right. Wrap the left side of the thread under and over the cord on the left.

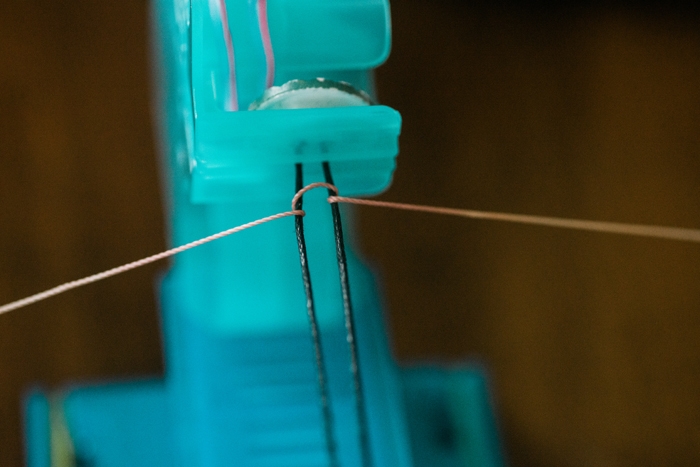
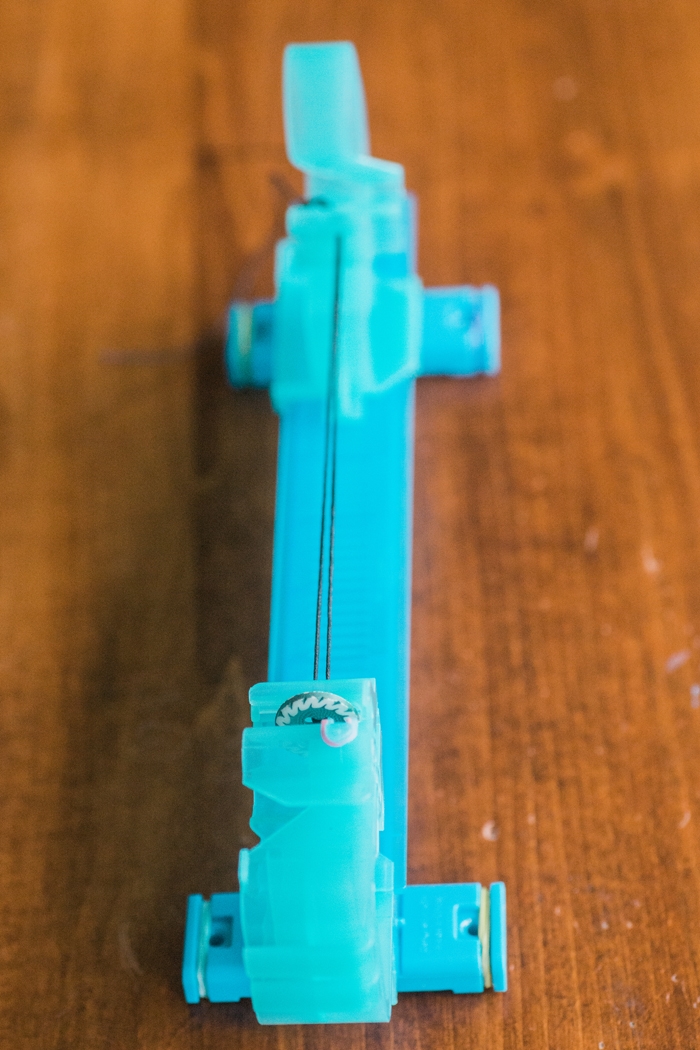
Adjust the string so that the wrap line is centered with equal halves. Pull ends to tighten. Thread bead onto one side of the string. 
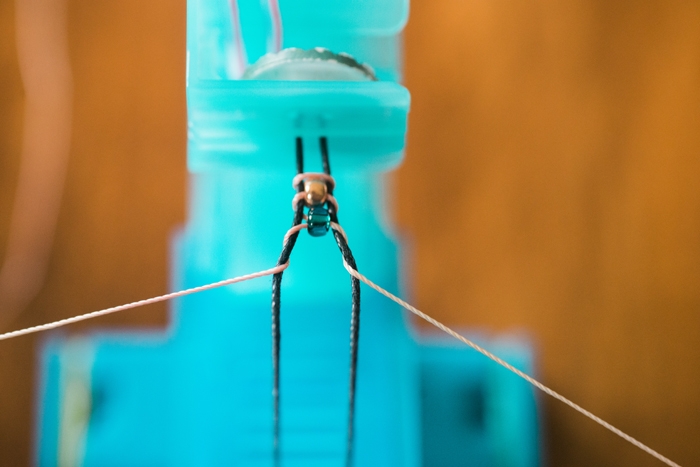
Thread the same bead with the other string, going the opposite way.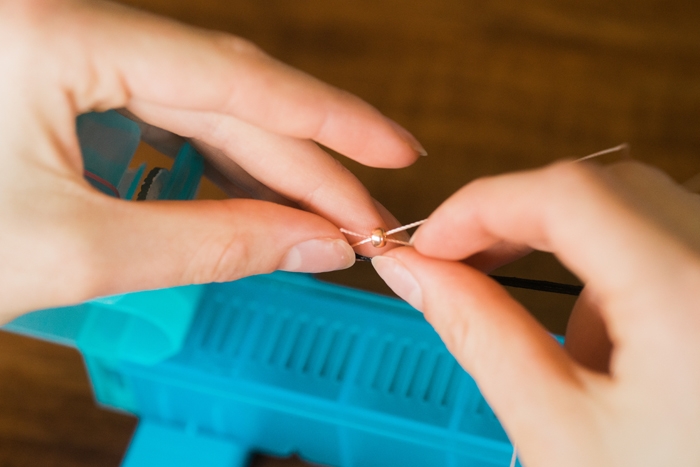
Pull both ends of the string to slide the bead in between the cord. 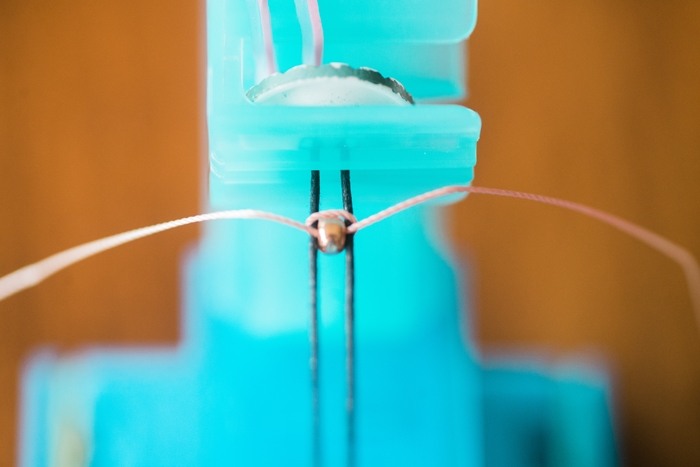
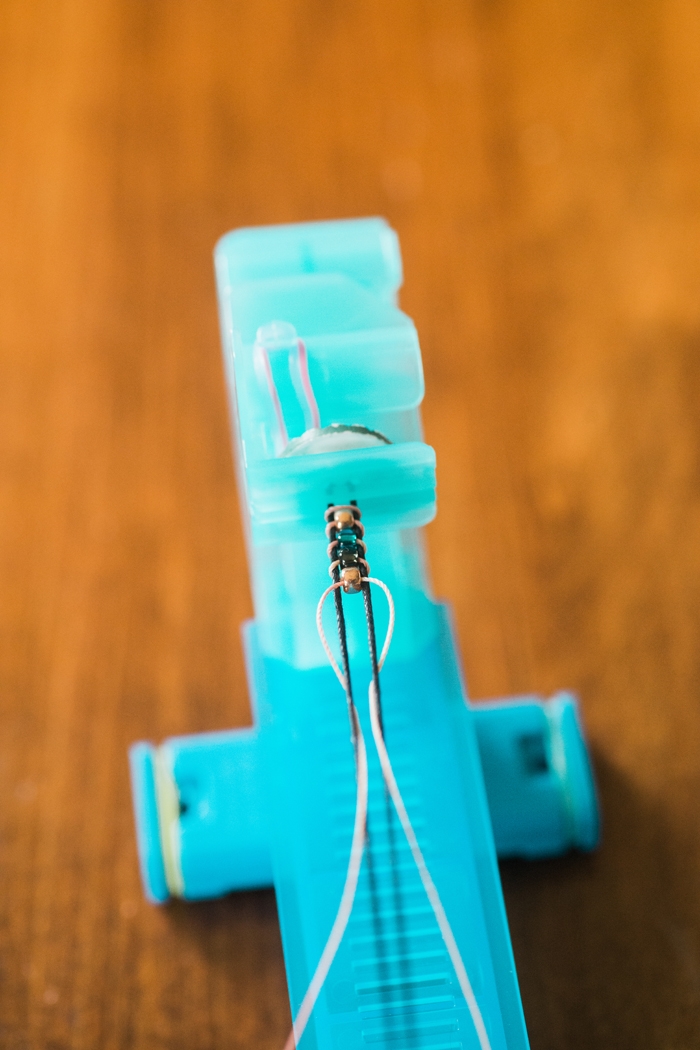
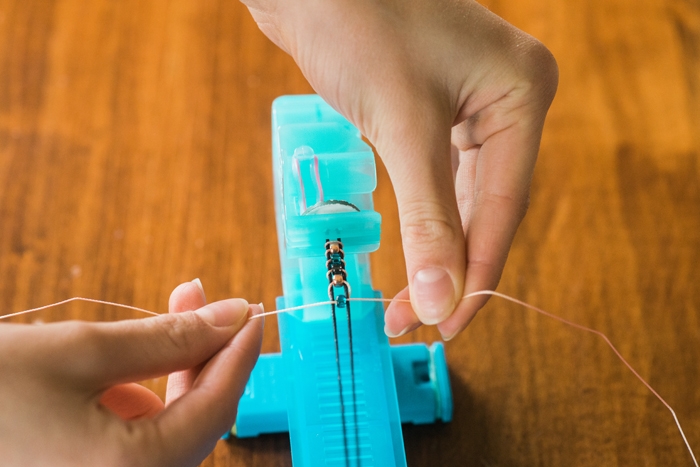
Repeating what you did before, wrap the right side of the thread under and over the cord on the right. Wrap the left side of the thread under and over the cord on the left.
Add another bead onto one of the strings. Thread the same bead with the other side of the string the opposite way. Pull to tighten.
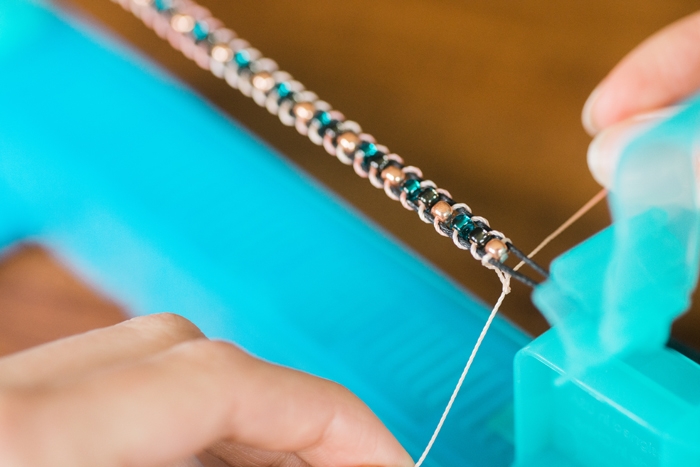
Repeat until you achieve your desired length.
Secure by tying a knot with the wrap line. (We tied it three times to make sure it was secure) .

Cut excess wrap line.
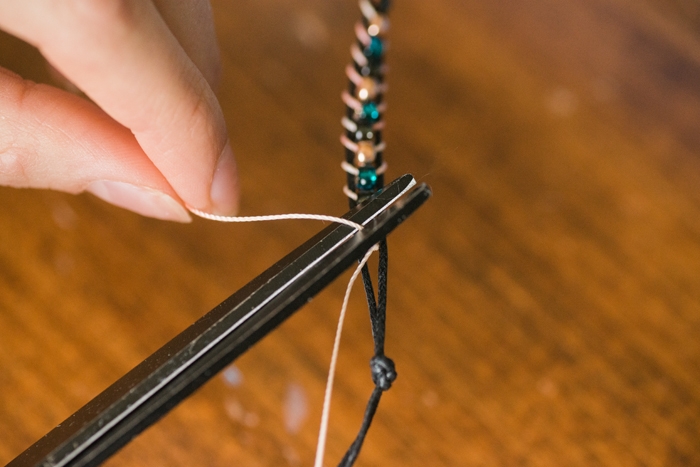
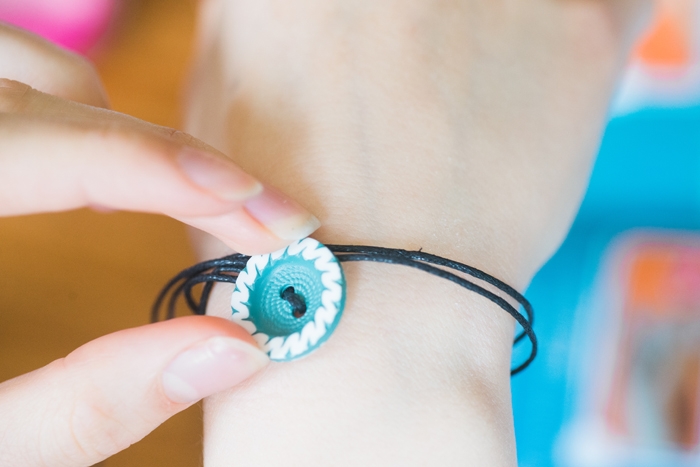
Tie another knot in your cord to create a button loop.
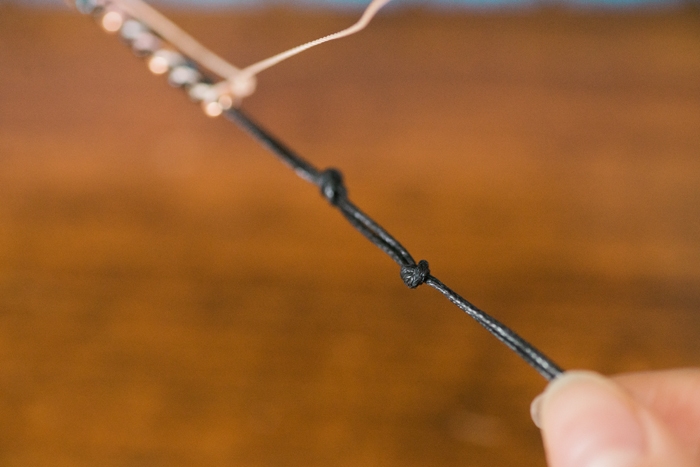
Cut excess cord.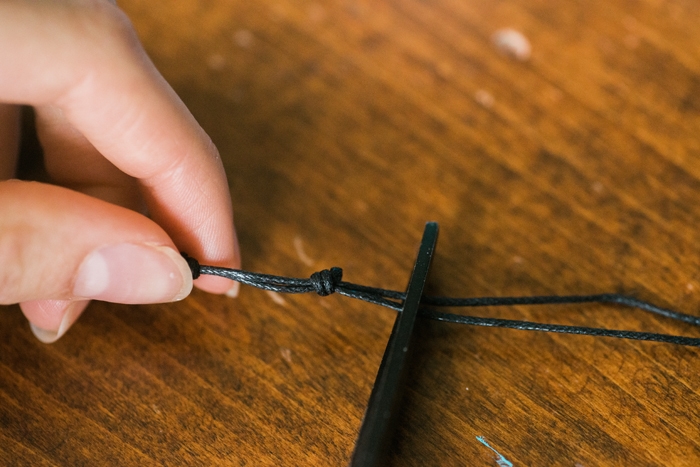
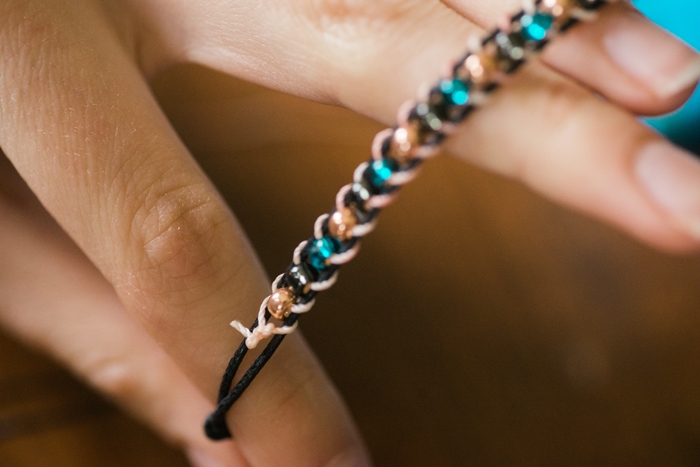
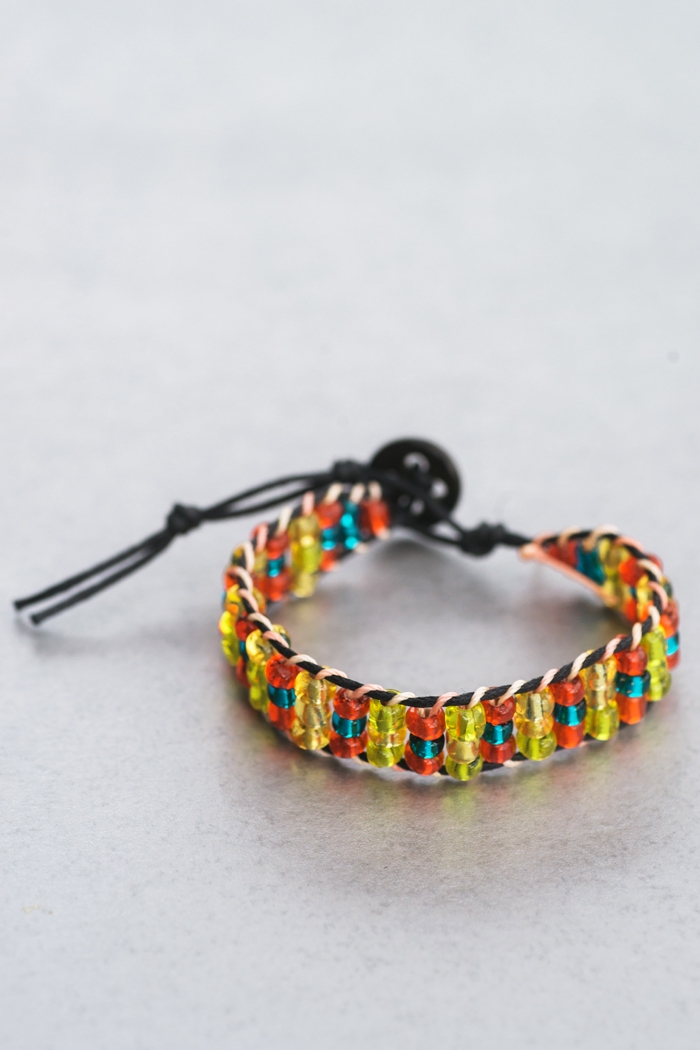
Voila! Your bracelet is finished.
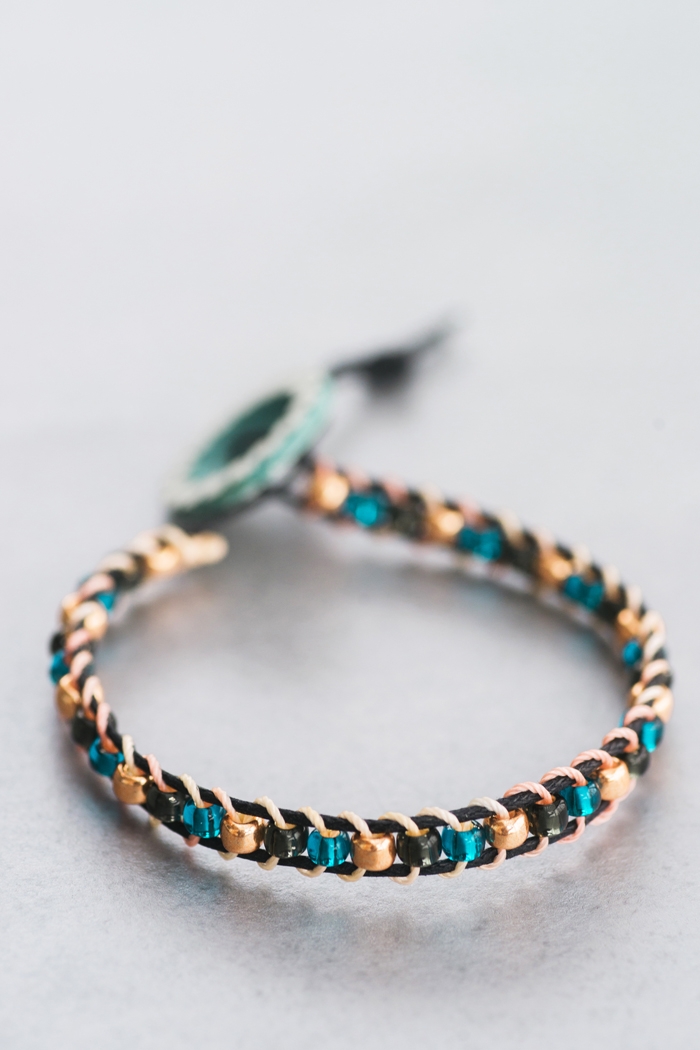
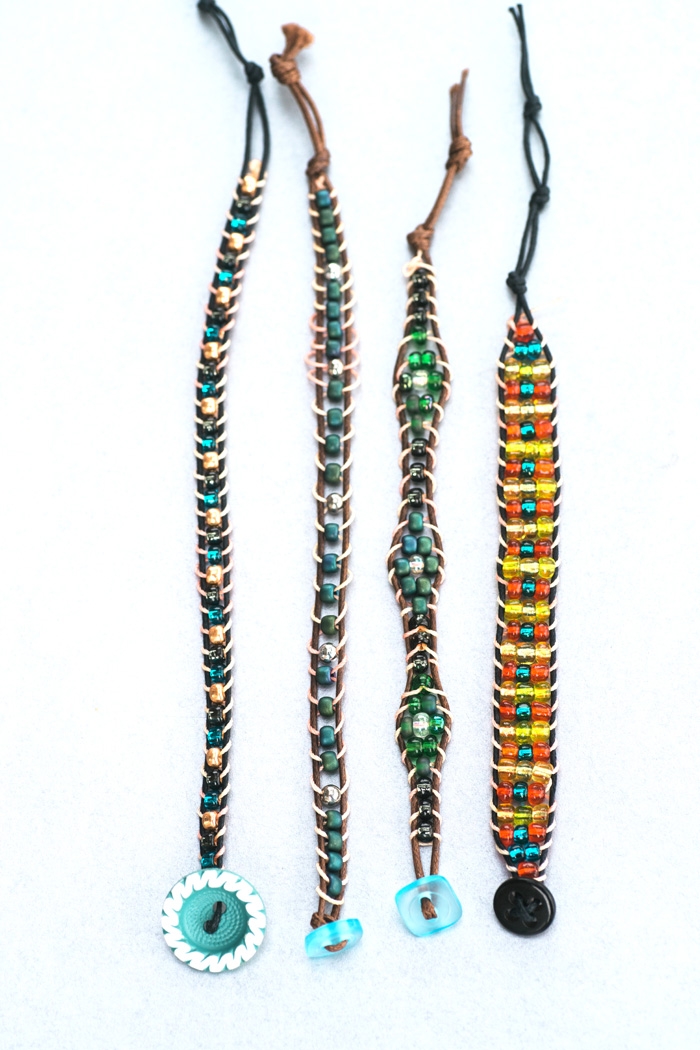
Here’s another one using different beads:
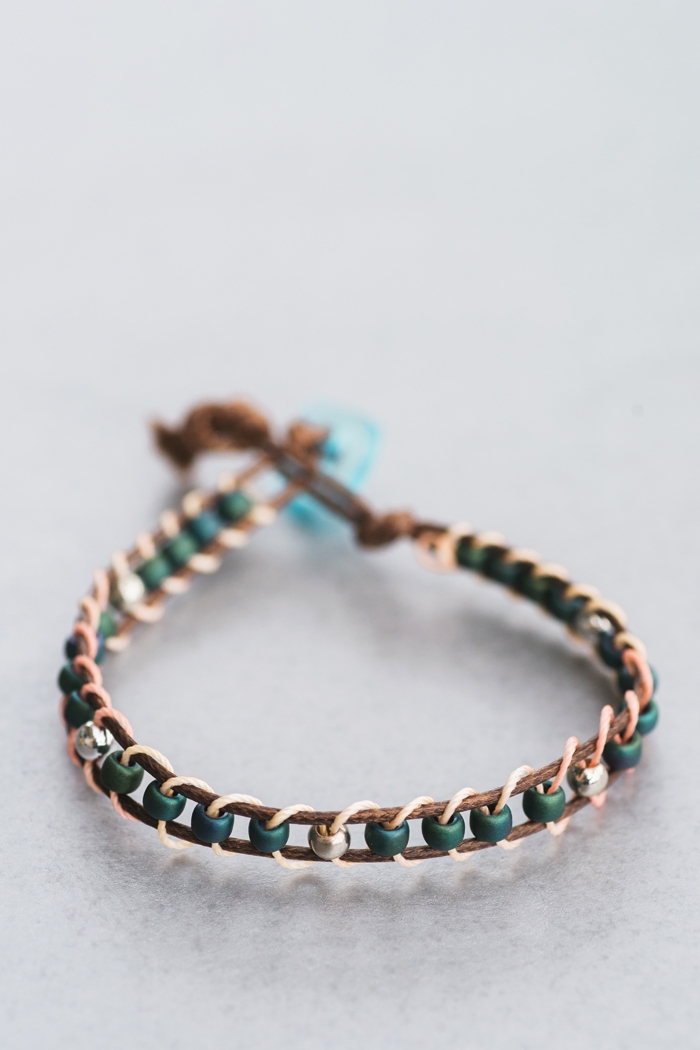
You can also create patterns using multiple beads:
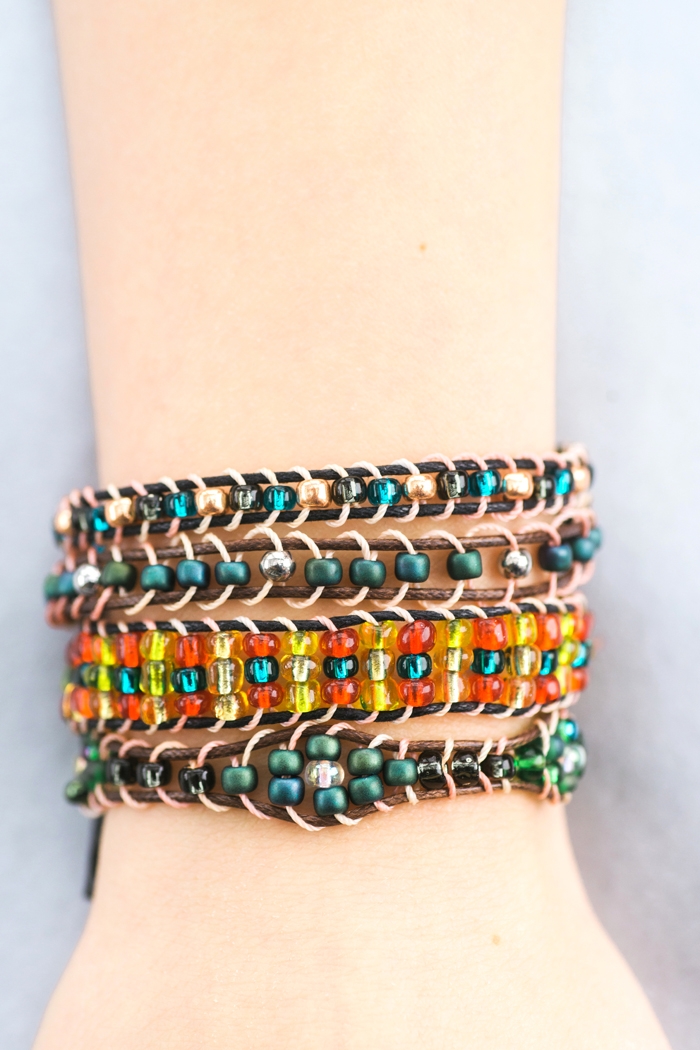
They look fabulous grouped together!
This video from Made By Mommy gives step by step instructions on how to use the Wrap-It Pro Bracelet Maker:
*This post includes Amazon Affiliate links.